Doing a painted art wall might seem like a daunting task for most. But with the use of the right stencils and techniques and a little practice, you can paint your own accent walls for really cheap. And most importantly, you will feel accomplished and satisfied (maybe a little tired too) after your project completes.
Getting started on your wall painting project
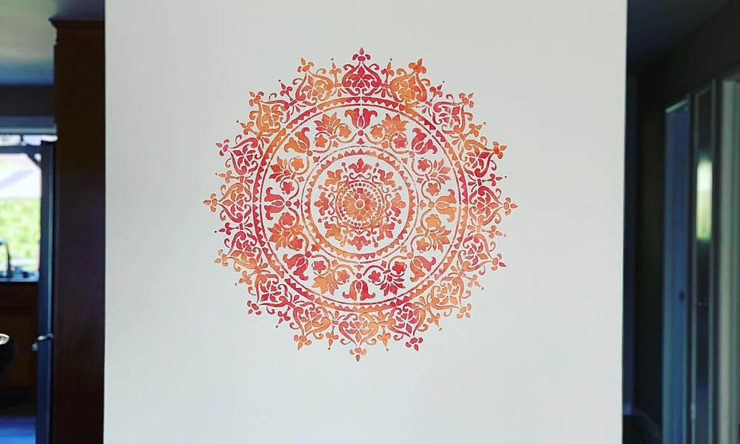
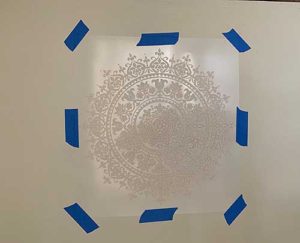
The first task in the project is the selection of wall and design of the stencil. Stencils come in a wide variety – mandalas, tiles, floral/tropical, seasonal, Moroccan/Indian, chalkboard, fossils, lace/border, etc. You can choose to stencil all walls of the room or pick one wall as your accent wall. For my first project I picked a narrow wall at the house entrance and a mandala as my stencil. I thought it would be better to start with something small and see how it goes before jumping on to a whole wall or room.
Next step is prepping the wall – which might not be needed if your wall color does not need to change. If you need to change your wall color, then you might want to prime it and then color it, else just a quick dry wipe down of the wall is good enough.
Before you proceed to the next step, you may want to practice first using your stencil to know how much pressure to apply. I practiced stenciling on large sheets of paper with the same colors and foam roller brush that I was planning to use on my wall, so I knew how my end result was going to look like.
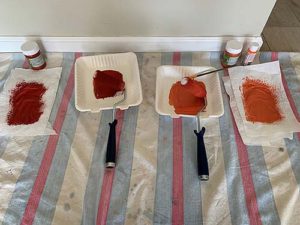
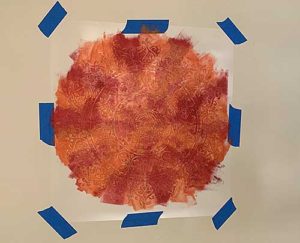
A very important lesson in painting using stencils is that your brush should not have excess paint, else your design will bleed. So keep a few sheets of kitchen roll with you to wipe down the excess paint before you roll it on to your stencil. Also apply medium to light pressure when rolling. A good high density foam roller is a better option for wall painting.
Materials to Use
Talking about stencil paint, both acrylic as well as interior latex are great options. You may use flat paint or metallic. Also, multiple colors can be used for stenciling, in which case you may want to use a good quality stencil brush instead of high density foam roller brush for better control. Although using a stencil brush is more time-consuming, it might be worth it for not just multi-colored projects but also for edges and corners.
Now we want to measure our wall to accurately position the stencil. You want to make sure your design is going to be centered horizontally on the wall. For tiled designs, if the edge designs are going to be cut off then you want to keep the edge columns for the end so you can even cut your stencil to make it easier. In that case you want to start off with your second column. The same might apply to vertical measurements, or you may want to start your design at the very top.
Place the stencil on the wall, use a level that can be attached to stencils to ensure accurate positioning and use broad painter’s tape to attach the stencil to the wall. You can optionally use spray adhesive on the back side of the stencil to keep it in place in addition to painter’s tape.
Prep the surrounding area
Next we need to prep the area around by covering it with plastic or paper to catch dripping paint, if any. Use painter’s tape if needed to keep the plastic/paper in place. Use paint trays or paper plates to hold your paint. Dip the foam roller or stencil brush in the paint, roll/dab the excess paint on the kitchen roll sheets and start rolling on the stencil.
Once done, reposition your stencil to the next spot and repeat until your project is complete! Depending on the size of your wall, this could be a project for a few hours to a few days.
Note: the paints should not be diluted and no sealing is needed on interior walls. For exterior walls as well no sealing is needed if exterior paints are used.
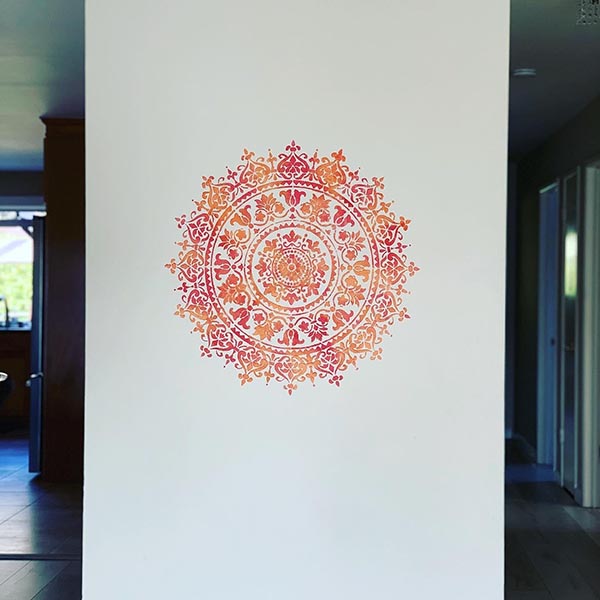
Here is how the completed wall stencil design looks in the entryway of my home:
List of must-have supplies:
High quality stencil(s)
Paint(s)
Painters tape
High density foam roller or stencil brush
Paint tray or paper plates
Kitchen roll
Optional supplies:
Spray adhesive
Plastic/paper to cover the surrounding floor/area
A good source of stencils, supplies and lot of information on stenciling is Cutting Edge Stencils. Their stencils are high quality and would provide desired results with ease.
My inspiration for wall art comes from a very close friend, Sridevi Billa. She can be reached on Instagram at https://www.instagram.com/instasrilicious/. Sridevi is an exceptional baker and an avid DIY artist. She has not only lent me the pictures of her projects for this article but also ideas and supplies for some of my projects. 🙂
Below are photos of some of Sridevi’s completed wall stencil projects. Please have a look!


To learn about some more painting techniques, check out this article on painting and upcycling glass bottles, and this article about acrylic pour painting.
This article was written by my friend Anushree Neurgaonkar. Anu’s creativity and enthusiasm for art and home design is such an inspiration! — Angie