Deleting the Background from an Image using the “Remove Background” Feature
1st method: using the Magic Wand Tool | 2nd method: using the Select and Mask Tool
3rd method (newest and quickest way of doing this):
This is the third in a three-part series of tutorials on how to remove or delete the background of an image using Adobe Photoshop. There are many different ways of achieving the desired results — getting rid of the unwanted backdrop area of an image or photo — so these are only but a few. Use the two links above to easily access the first and second related tutorials.
I had no idea there even was a super-quick way of separating the subject (main focal point) of an image from its background until just recently, to be honest. I happened upon it by accident. There’s a new feature in Photoshop – inside the Properties menu – that removes backgrounds really fast, and it’s simply called the “Remove Background” feature. Here’s a run-down on how to use that feature:
- Open your image, illustration or photo in Photoshop. My starting photo is a snapshot (JPG) from that old film of “Bigfoot” from October 1967, taken in California by Roger Patterson and Bob Gimlin:
- Once your image opens, look over to the right at the big menu there (or look down or where-ever it happens to be on your device). Make sure the Properties tab is selected then check to see what’s there under Quick Actions. You might need to click the little “>” to expand that panel if it isn’t already visible, or try dragging the Layers panel down a bit to reveal the other panels under Properties.
- If your starting image happens to be a GIF image file you probably won’t even see “Remove Background” as an option in the Quick Actions section of the Properties panel. You probably won’t see “Select Subject” either. I learned this the hard way. At first this is all I could see in that panel (or menu):
Well, after spending a bit of time searching for those options, I finally decided to copy my GIF image to the clipboard and paste it as a new JPG image instead.
- Even after I pasted my image into Photoshop (as its own new, separate image), I couldn’t see any Remove Background options. But then I clicked the tiny padlock under the Layers panel/tab to unlock the layer.
- Once I did that, finally these options appeared under my Properties > Quick Actions panel:
This is how that whole big Properties menu looks, with the Quick Actions section expanded:
- Simply click Remove Background and you should see your main subject being selected and isolated from the background, then the background area will be magically deleted!
This whole removing background process (quick method) creates a Layer Mask. This new Layer Mask contains just your selected main subject, without any background. Your starting image should still be somewhere there, still intact – should you change your mind.
If you’d like to start over, one option is to click on the little Layer Mask thumbnail, right-click your mouse and choose the option to “Delete Layer Mask.” This is how the little thumbnails for the masked layer and the original image appear (the masked layer is on the right):
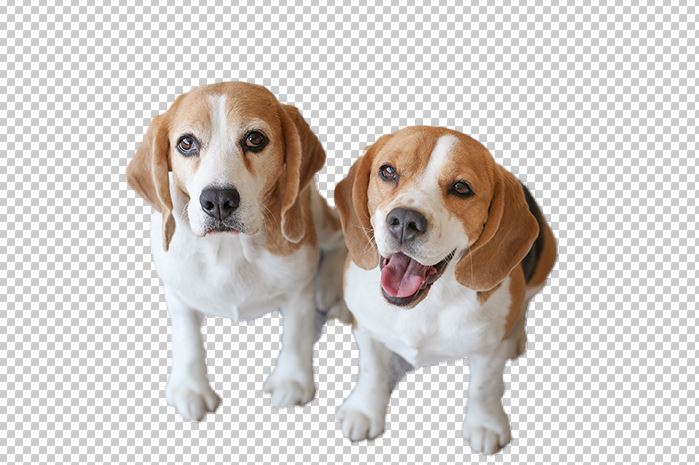
This is how the final selection looked with the background removed:
It was super fast – but it was not a super accurate selection (the one drawback of using this quick method). You might need to go back and touch up the selected main subject Mask to add or remove bits here and there.
By the way, I wound up taking my Bigfoot cutout/selection/image and turning it into a t-shirt design (waste not, want not, right?) Here’s the finished design if you would like to take a glance!
I hope you found this tutorial useful – please share it if you did, and thank you for reading!