In my 20 years of using Photoshop I’ve seen it evolve and grow into an incredible tool for editing photos, graphics and other kinds of imagery. But I sometimes forget that it is also an excellent tool for manipulating typography and creating cool special effects with text. I absolutely love using Photoshop because the creative possibilities are endless!
If you’ve ever asked yourself, “Self – how do I outline text in Photoshop?” (I had a math teacher in high school who used to say this during pretty much every class: ‘you may ask yourself -“self — etc.” He said it so often it’s imprinted upon my brain!)
Anyway – if you’ve ever wondered how to create cool text outline effects using the wonders of Photoshop, you’ve come to the right place. Below I go into detail about just one of the many ways that text can be styled and altered, using this amazing software and platform.
STEP 1: Get your document ready and add a text layer
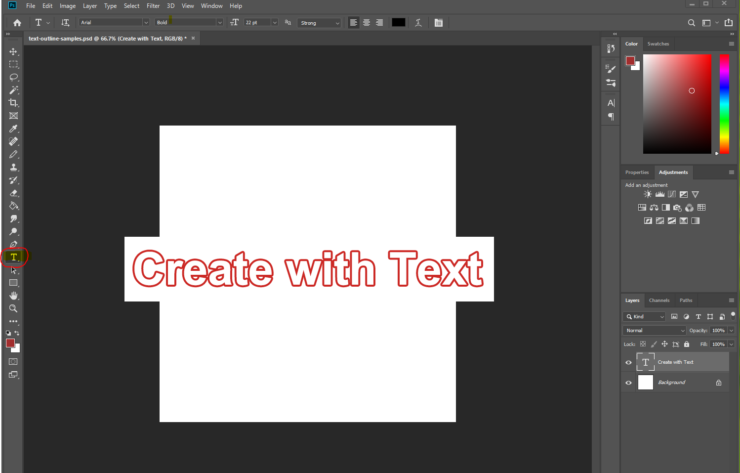
Open up Photoshop (I was using Photoshop CC at the time of writing this article), then either choose File –> New or File –> Open to get your canvas ready. Then in the main menu (usually found along the left side of your Photoshop screen) choose the Horizontal Type Tool. Click anywhere on your canvas and type away! Photoshop will throw some Lorem Ipsum (fake placeholder) text in there, so of course you’ll need to highlight that and change it to your desired text.

STEP 2: Adjust the size and style of your text
Change your text to whatever style, point (pt) size and level of boldness you’re looking for by making sure your text is highlighted. This will cause the type menu to appear near the top of your PS screen. Simply choose a font style from the drop-down menu and finish adjusting the text to your liking. This is also where you would change the font color by clicking on the colored rectangle and selecting a color from the little popup box.

STEP 3: Apply the style called “Stroke” to your text
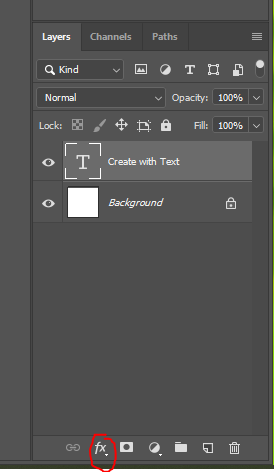
First make sure that your text layer is selected in the Layers menu, then choose “fx” down near the bottom of your PS screen:
Then in the window that pops up, choose “Blending Options.”
OR
You can double-click on the text layer from the Layers menu, and that will cause that same popup to appear. Then choose “Blending Options.”
OR
You can also right-click on your text layer and choose “Blending Options” from that window that pops up. (so many choices … !)
Anyway – let’s move on to…
STEP 4: Experiment with different “Stroke” options
Now that you’re in the popup window, click on “Stroke” in the left to select it. You can play around with different options such as the size the stroke (text outline), position, blend mode, and opacity. In the example below I have chosen a position of “center”, which causes the stroke to cover part of the inside and outside of my text (blend mode normal, 100% opacity):
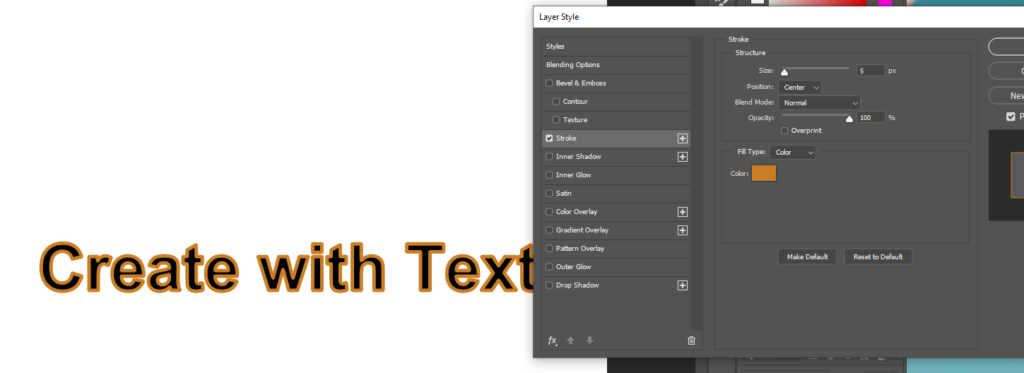
You can also change the “Fill Type” style to a solid color, a gradient, or a pattern.
Choosing a Fill Type of “gradient” opens up all sorts of cool possibilities for special effects. This happened when I chose the gradient option in grayscale –>

This effect was created by bringing up the size way up to 49, then choosing a position of “Outside”, a blend mode of “Darken”, with a gradient style of “Linear” (15% for the Angle) –>

And my text outline completely disappeared by choosing a position of “Inside”, a blend mode of “Normal”, with a Fill Type of “Pattern” –>

Don’t forget to also explore the creative other creative options that are available to you in that popup dialogue box!
For example, you can go all out and really make your text stand out by selecting “Bevel & Emboss” and adding a few other effects to your text, such as “Inner Glow” and “Drop Shadow.” This gives the text a nice 3-D quality –>

STEP 5: Creating a literal outline of your chosen text
Last but not least – another great effect you can achieve with text is to create an outline with no fill (or a transparent center to your letters) –>

This is a really handy technique to add to your bag of tricks, and it works especially well when overlaying text over graphics or photos. This pure outline effect can be achieved by first clicking “OK” to lock in the other cool things you just did to your text, then choosing that layer from the Layers menu. Then simply slide the “Fill” opacity way down to 0% for that layer:

Well, there you have it – this is just my take on what can be done using the Photoshop Stroke effect for text. Let me know in the comments if you have any innovative ideas as to what you can do using this amazing tool!


Thanks for writing this in-depth review. I read your website.
In fact, I found the information I was looking for in your article. It’s really helpful.
I have benefited from reading your article.
Thank you very much.