Summer is already here, schools are closing and with the current COVID situation summer camps aren’t the best option to keep kids engaged. When I am thinking about kids’ engagement and creativity, the very first thought that comes to my mind is stone and shell painting. This has been a foolproof activity at our home that has never let me and the kids down. This activity can keep kids engaged for days and has worked very well for me too as a de-stressor.
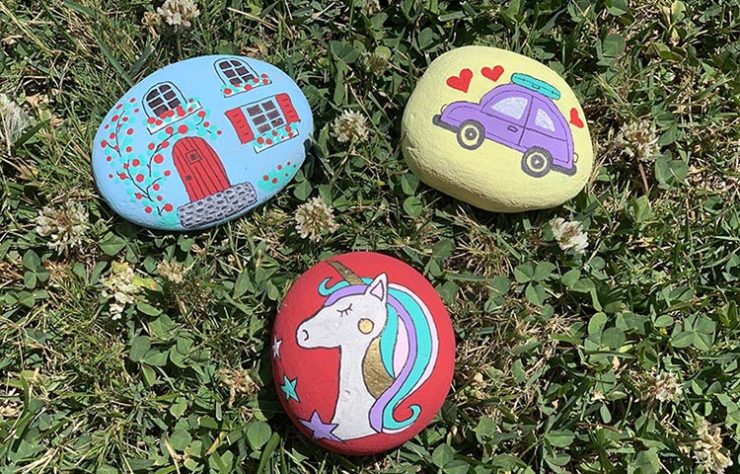
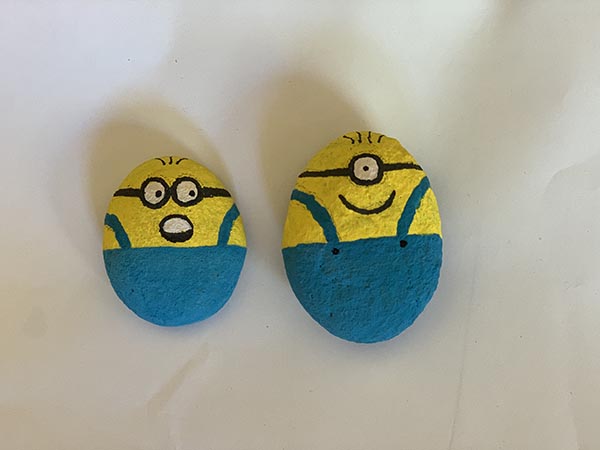
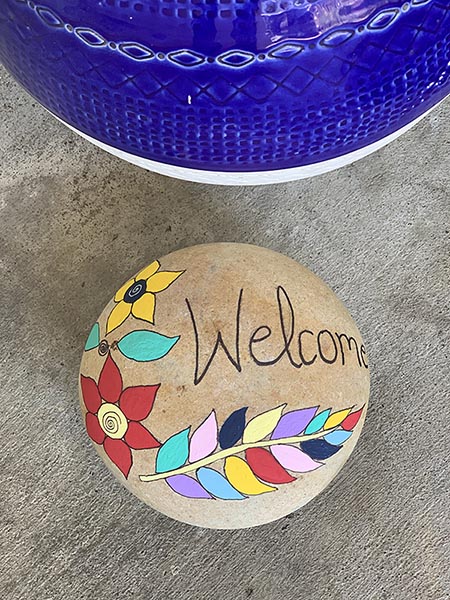
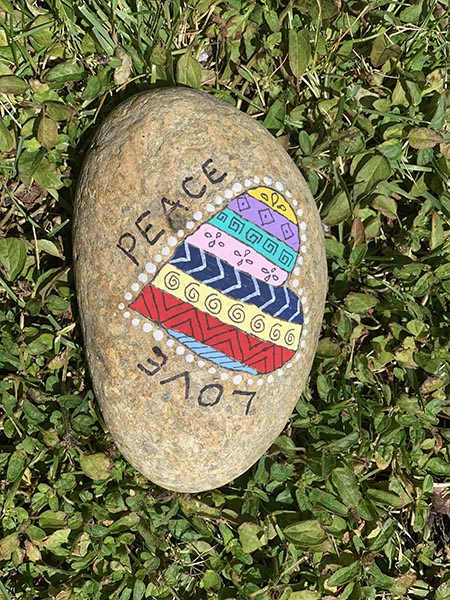
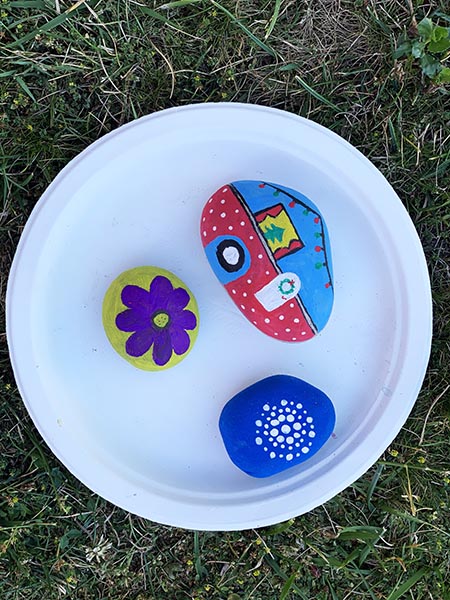
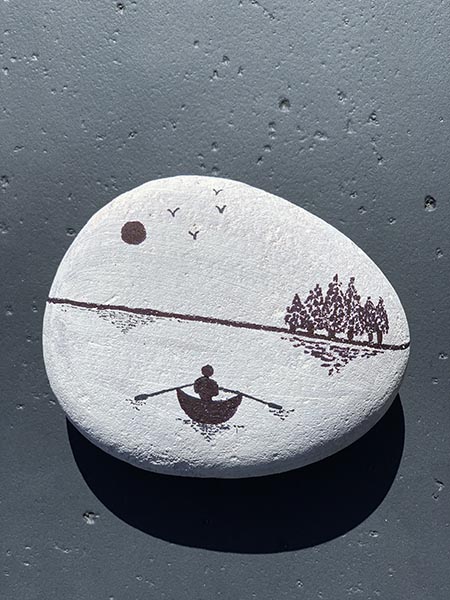
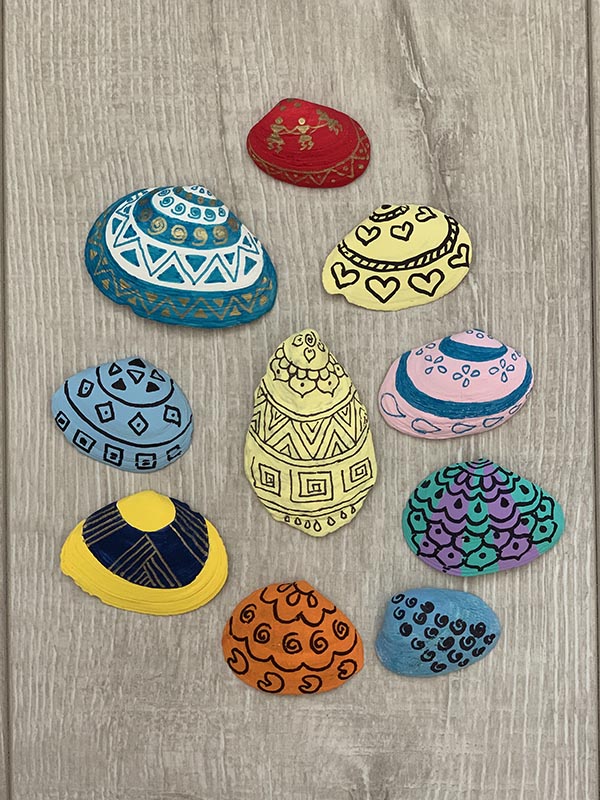
Here are a few of the stones we painted together:

Getting started and finding materials:
For us the activity starts with a visit to a near by beach to collect big stones and shells. This in itself is one of kids’ favorite activities. My family and I live in California, but If you aren’t living in an area where you could easily find them in nature you can buy them at home improvement or hardware stores (at a Michael’s craft supply store, for example).
When we get home from the beach we leave the stones and shells in soapy water for a few minutes. It helps to get the dirt out easily. After a few minutes we get them out of the soapy water and scrub slightly before rinsing off and air/sun drying. You can use sand paper to smooth the stones up a bit, if you like a really smooth look and feel and your stones aren’t very smooth to begin with. We skip this step as I like the natural stone finish.
The next step is deciding what you want to paint on your stones and shells. This is where you let your creativity go wild!
The supplies you need may differ slightly based on your decision. You can decide to draw cartoon characters, flowers, trees, feathers, caravans, houses, mushrooms, hearts, unicorns, pets, lady bugs, caterpillars, mandalas, henna designs, basically anything you love or can imagine.
You will need acrylic colors and appropriate brushes to create these. You may decide to give a coat of base color to the entire thing or just the front of the stone/shell before drawing and painting the design you choose. I prefer to not skip this step but it is completely optional. You can also use sharpie pens or acrylic markers to create delicate designs or for outlining the designs. Mandalas are created using the back of different sized brushes.
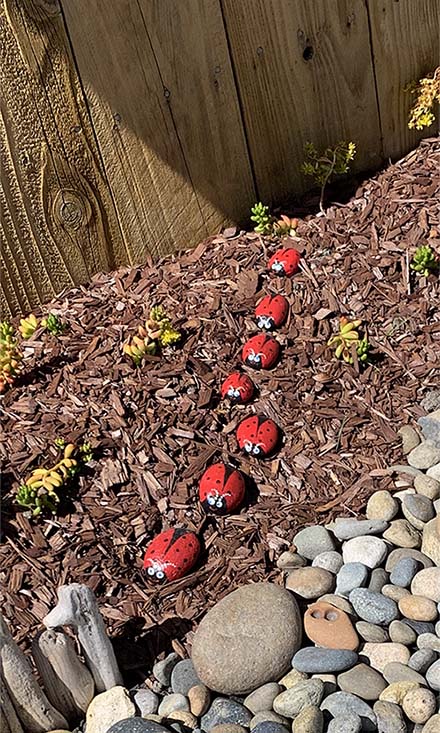
You can either create your design on a single stone or split it on multiple stones and put them together when they are ready to be displayed, as a collection. For example, you can create a caterpillar on one stone or you could use 8-10 stones, color them and put them together as your caterpillar. You could even have a theme for your art collection. We do not normally go with a theme since I prefer not to restrict the kids’ creativity.
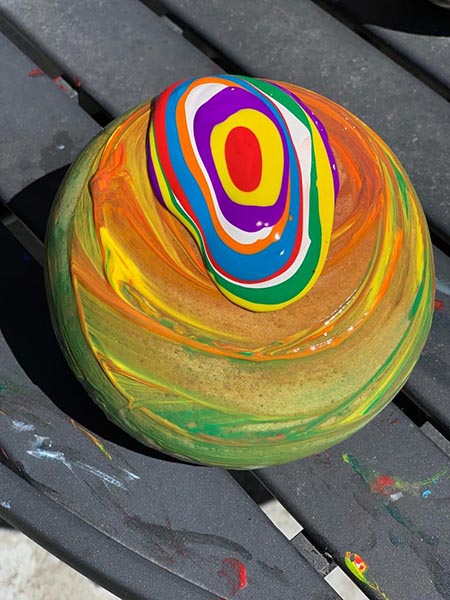
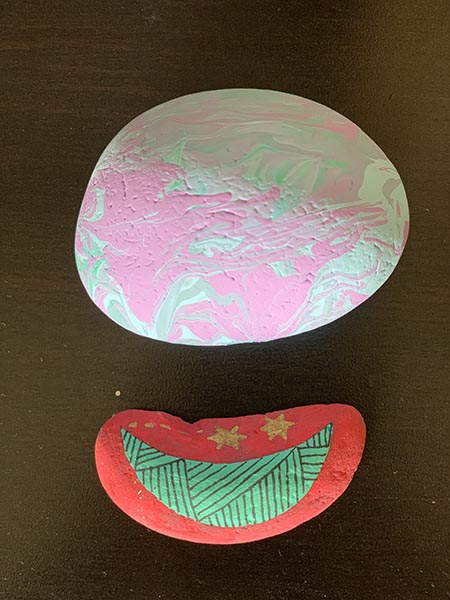
One other way of painting is to give a mosaic or marbleized look. There are different techniques that you can use to achieve this look. Additionally you will need a marbling medium, sticks, disposable spoons, tooth picks, craft cooling rack and disposable plates in your supplies.
To create this look you will need 2-3 colors, mix one part each acrylic paint with 2 parts marbling medium so it is dilute and flows easily. Don’t mix the colors together.
- One option is to drip each color mixed with marbling medium randomly on to the stone using sticks or spoons and tilt the stone in different directions to create the mosaic.
- A second option is to pour the base color on the stone, drip other colors on it using sticks and drag tooth picks through the surface to create the mosaic.
- And a third option is to pour or drip the colors on a paper, use sticks or tooth picks to swirl the colors, roll the stone over the swirled paint a few times until you like the look and leave it on cooling rack for drying.
Finally, the last step in this activity is sealing your art. Sealing increases the life of your art work and is especially needed if you are going to leave the stones and shells outdoors in the sun. Sealant can also give a desired look such as matte or glossy. Sealing should only begin when your art is completely dried. For this purpose you can either use a spray sealant or a liquid sealant. Whichever sealant you are using be sure to have at least 1-2 coats. If you are using a spray sealant make sure to spray from a distance (6-8 inches at least) so that your sealant does not make your colors run.
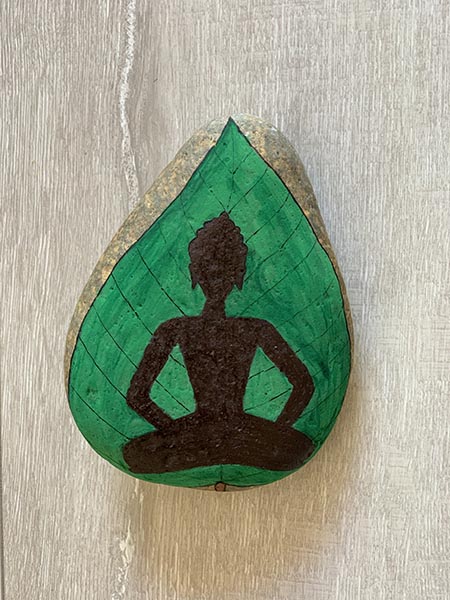
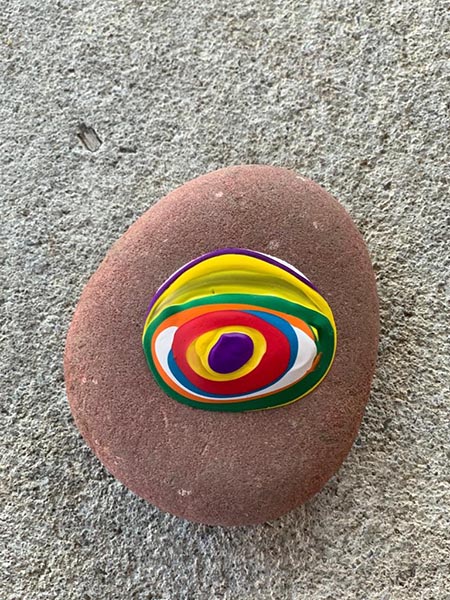
Here are some more of the designs my children and I created together:
To learn about a few other art forms, check out this article on designing with Rangoli and this one as well: designing with Henna.
Hi readers, I am Anushree Neurgaonkar or Anu as my family, friends and colleagues call me. I am a working mom of two girls named Zoie and Nora, and live in Foster City, CA with my family.
I was born in Mumbai India and lived there half of my life and have been living in the Bay Area for the rest. I like to look at life as the most precious gift and wish to enjoy every bit of it. My creative side and my girls help me achieve the balance to carry on the hectic Bay Area life while pausing and smelling the roses on the way. I am a big travel enthusiast and love to try out different adventure sports.
Thank you to Anu for this article. : )
I met Anu several years ago, when we were both working for a Fortune 50 corporation here in Connecticut. Anu is a beautiful person, inside and out and her creativity knows no bounds!
– Angie


