Hello readers! As I was writing this the holidays were rapidly approaching, my creative juices were at an all time high and so was my children’s energy at home. So to handle them both gracefully, we jumped into another fun kids’ activity and catalogued the process along the way. I was looking for a fun arts & crafts activity that would keep my kids busy for hours at a time – with minimum intervention from me.
And I found it!
It’s making your own scratch pad/art paper.
My older child learned this from her friend at school and taught us all at home. Below are some instructions to help you get started and some photos we took as we progressed with this activity.
Here are the supplies that you will need:
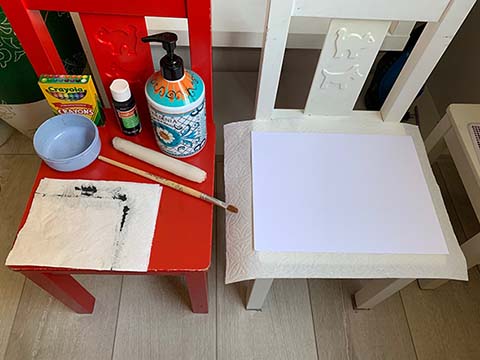
- White or light colored paper or card stock
- Colored Crayons (Regular work fine, oil crayons work better)
- Liquid Soap (Any kind – hand or dish soap)
- Black Acrylic Paint
- Paint Brush
- Unlit wax candle stick (white) (not needed if using oil crayons)
- Large Paper to cover your work area
- Small bowl
- Wooden scratching tool or thick needles
Once you collect all your supplies, spread the large paper across your work area. This is to minimize your clean-up later on.
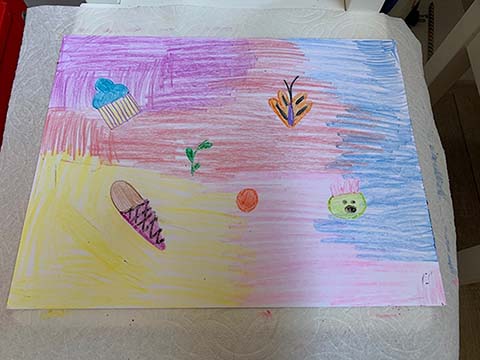
Start the coloring process by using crayons to color your entire sheet of paper or card stock that you are using to create your scratch pad. You want the entire area covered with a thick layer to get the best results. Make sure there are no un-colored areas. You could use just one color or multiple colored crayons. My kids love to use a lot of colors! They prefer to do diagonal stripes across the paper with as many colors as they can fit in.
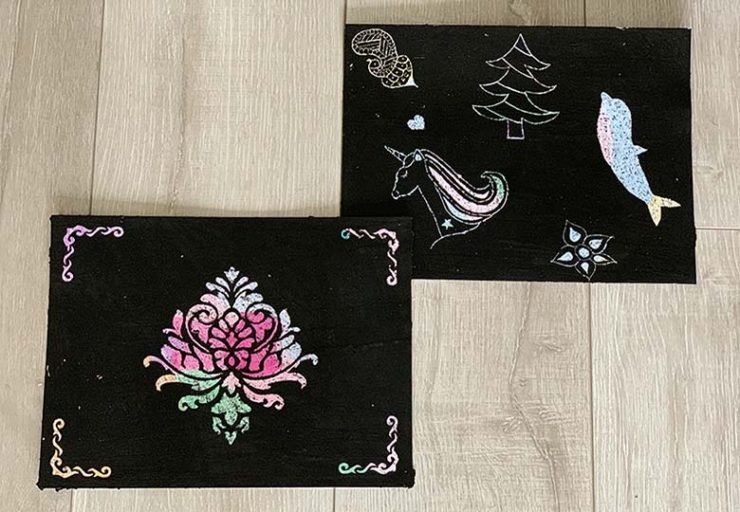
There is no specific pattern that you need to create since the entire paper is eventually going to be colored black. Although you could fit in some designs in there too, like how my daughter drew the cup cake, ice cream, etc. on this one here:
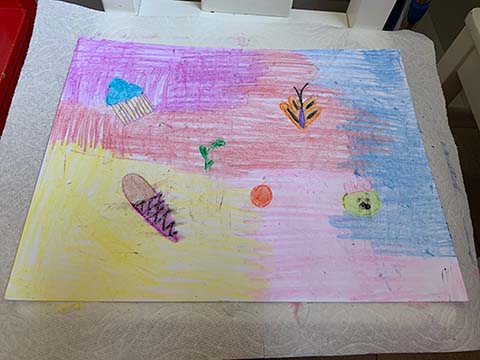
After the whole area is covered with colors, wait a few minutes and then use your wax candle stick like a crayon to wax your scratch pad. Again, make sure to cover the whole area for better results. This step is not needed if you are using oil crayons, as they already have the wax effect. Wait a few minutes again after this step.
Next you will need to create your mixture of black acrylic paint and liquid soap.
There is no exact requirement of the proportions. You can use approximately the same amount of soap as black color.
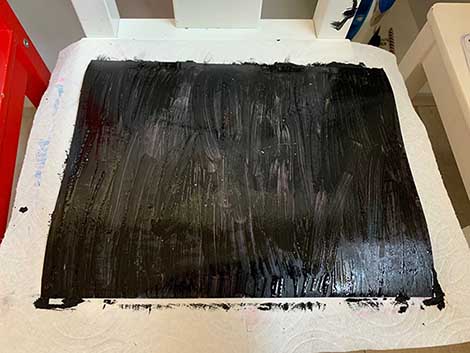
Mix thoroughly in the bowl and then spread this mixture in a thick layer onto your waxed paper. This step is the most messy step, so make sure you have your large paper underneath.
You might need to do multiple coats of this mixture if the first layer does not turn out to be thick enough to hide all the color underneath.
Wait at least 30 mins to an hour between coats or use a blow dryer to speed up the drying. Once you are done with all the coats, wait again for 30 mins to an hour before starting to scratch. Letting it dry overnight is better if you can manage your kids to be patient.
The last step is to enjoy the scratching!
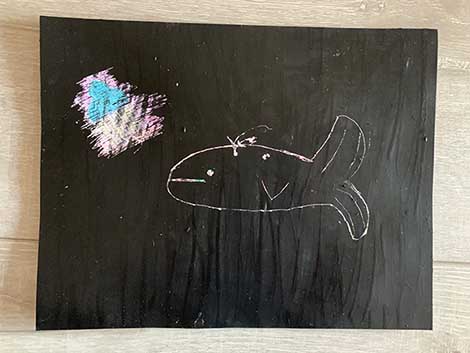
This is where you can bring out your creativity and scratch out unicorns, dolphins, flowers, butterflies or whatever you like. A wooden scratching tool is the best to use but if you don’t have it you can use craft or thick needles to do the outlines, and objects like keys and coins to scratch large areas. You could also use stencils on your scratch pad to create neater designs.
Here is a video of my daughter detailing the process of creating the scratch pad/art paper:
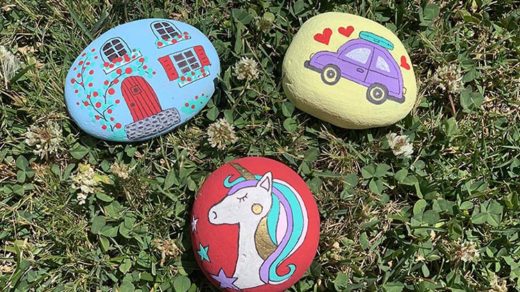
Here are a few of the finished scratch pad designs my kids and I came up with:

Finally, if you do end up messing up your table or floor while creating the scratch pad, you can use alcohol wipes to clean up easily.
To learn about a different style of painting at home, check out this article on the wonderful art of wall painting using stencils.
and –
Please share this article if you liked it, and let me know in the comments what designs you came up with!
This article was written by my friend Anushree Neurgaonkar. Anu’s creativity and enthusiasm for art and home design is such an inspiration! — Angie