As I mentioned in one of my earlier articles about a photo guessing game I had created using CSS and JavaScript – one of the things I love about my profession is the seemingly endless possibilities of what can be done using code, and how it gives me (and others) the opportunity to be creative.
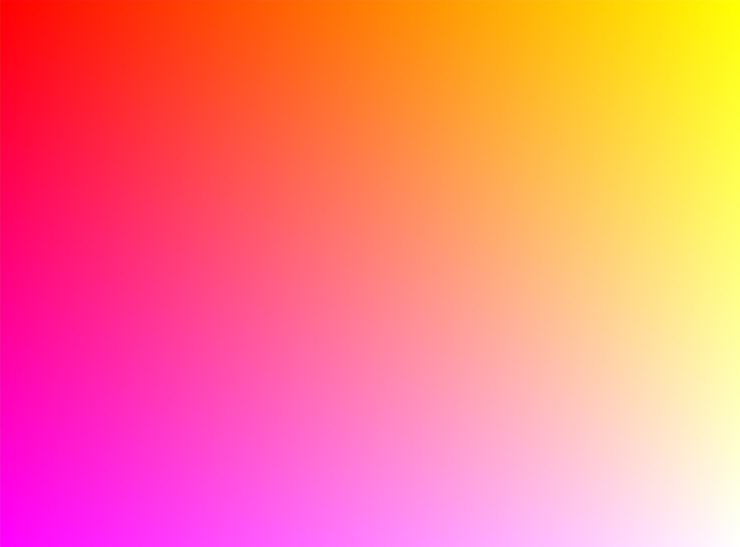
Below is one of my husband Chris’ experiments. He is fascinated by gradients, and has been getting more and more into JavaScript lately.
CSS and JavaScript-based Gradient Tool
Here is an overview (not in exhaustive detail) of how Chris created this tool:
(I won’t go into agonizing detail about how this gradient tool was created, as this post would be a mile long, but I also wanted to give some type of overview on what coding techniques were used).
Get started by setting up an HTML grid
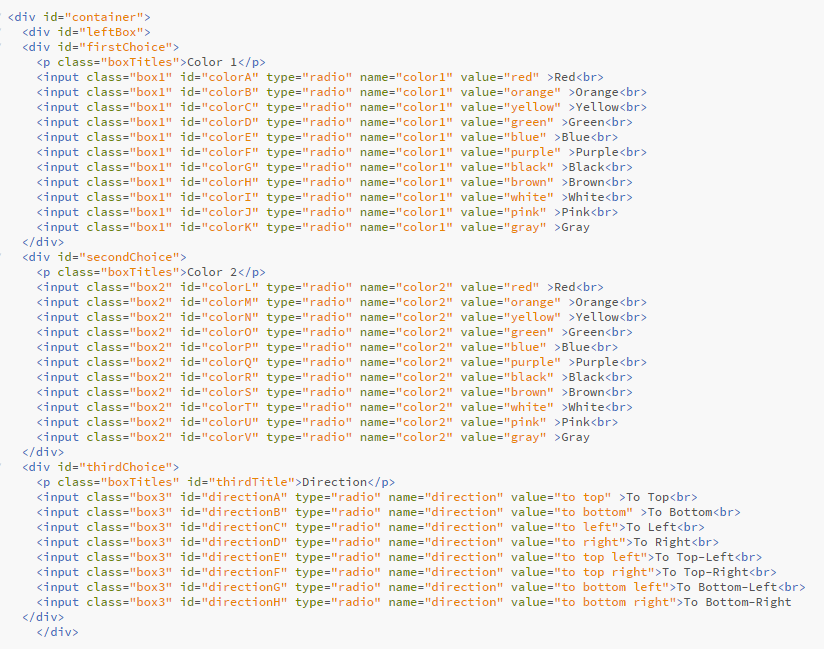
This is done by first creating an over-arching DIV to act as a container for all of the other DIVS to sit inside of. Give this DIV an id of “container”.
Next create two other main DIV areas – one to contain the left box and one to create the right box. We gave the left box an id of “leftBox” and the right box an id of “linGrad”.
Inside of the “leftBox” DIV, create three new sets of DIV areas to house the three columns for Color 1, Color 2, and Direction. This is where all of the radio buttons go as well as the column headings.
Since the right-hand box is mostly an empty container to hold the different gradients, the only thing that gets coded in there for now is some type of placeholder text. We chose to put <p id="gradText">See your creation here</p> inside of the “linGrad” DIV.
Here is that HTML code in more detail:
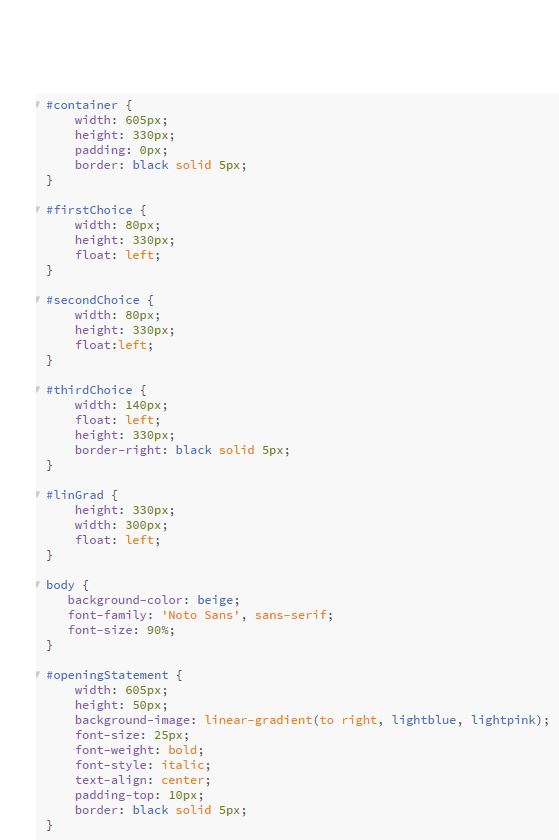
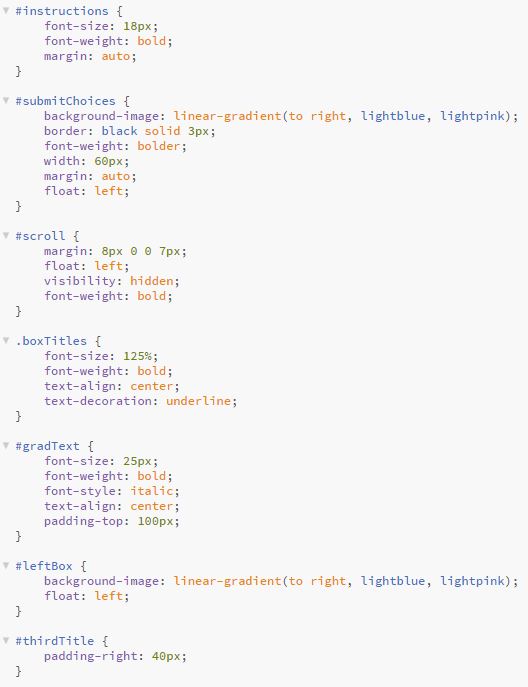
Then add your styling and link to the CSS file
We need to link to the CSS file that holds all of the styling info for the gradient tool, and that is done inside the HTML file from within the <head> section, as follows:
<link href="style.css" type="text/css" rel="stylesheet">
The CSS code is as follows:
Next you need to bring in the JavaScript
Next we need to add a CREATE button (using HTML5 code) to activate the JavaScript gradient. The html for this button should ideally sit below the rest of the code (add it below all of those other DIVs).
The code for that looks like this:
<button id="submitChoices" onclick="createGradient()">Create</button>
As for the JavaScript code itself, we are calling that inside the HTML file from within the <head> section, as follows:
<script type="text/javascript" src="script.js"></script>
Here is the JS code:
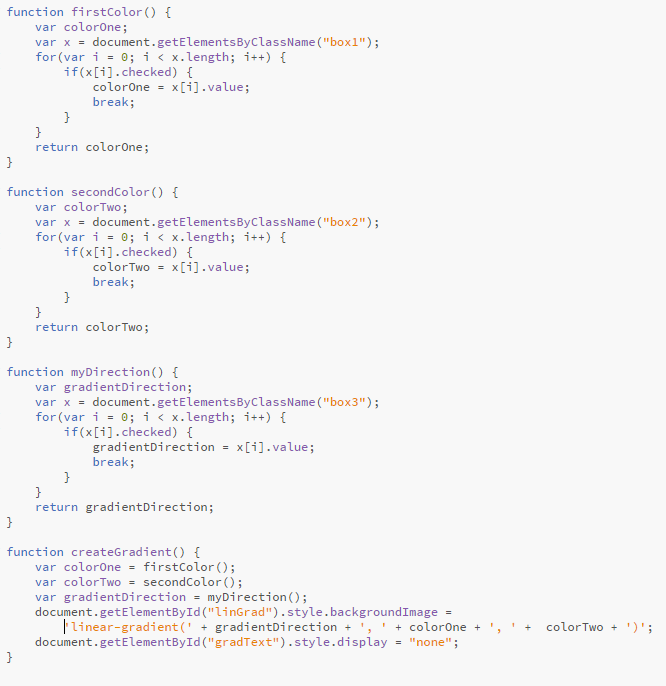
Finally, bring everything together
Within the JS code we created functions that looked back into the CSS and grabbed each individual ID (“colorA”, “colorB”, “directionA”, directionB”, etc). Then we made sure those values were returned when they were chosen via a front-end browser interaction. The way to grab different IDs within your CSS is by using the getElementById() method. This is a handy-dandy method and is used quite often in web development. For more details on getElementByID and how to use it in your code, a few good sources of training are W3Schools.com and the Mozilla Developer Network.
My husband and I both are constantly striving to learn new things and to brush up on existing skills, so W3Schools and MDN are a few of our favorite training resources.
I hope you liked this article and that it sparked a little bit of your creativity to go and create something with code!