Capturing a page or post might come in handy – or be necessary – for a variety of reasons and in a variety of circumstances. For example, when creating or redesigning a website for a client or a manager, this is a great way for them to review the progress you’ve made on the site and even to mark up the PDF with their comments and suggestions. Saving pages or posts to a PDF could be a good way to track changes and feedback throughout your organization. This method could be a good choice if you’re not ready to share a QA link yet, but would like some feedback on your website layout. Or you may want to save one of your blog posts to your hard drive so you can proofread it when you’re offline.
Whatever the reason you might need to do this –
saving a page from your website or blog to a PDF is quick and easy using the steps outlined below!
Instructions for Google Chrome | Instructions for Mozilla Firefox | Instructions for Microsoft Edge
In Google Chrome (with screen shots)
Navigate to the web page or blog post that you are looking to covert to a PDF.
Click the little hamburger menu (3 vertical dots) in the upper right-hand corner of your browser screen. Or right-click somewhere on the page or post, choose “Print”, then:
-
- Change the selected option in the Destination field so that “Save as PDF” is selected in the drop-down menu:
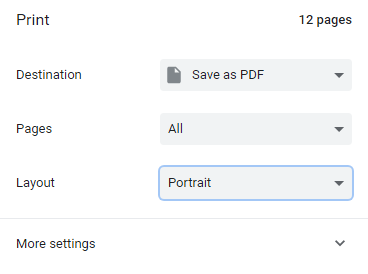
- Choose to print All under “Pages” to convert your entire web page or choose the Custom option if you’d like to choose how much of your web page to convert into a PDF (you might want to exclude the footer, for example).
- Under the “Layout” section choose either Portrait or Landscape in the drop-down menu. Modern websites lend themselves better to Landscape mode so I usually go with that.
- For more control over the resulting PDF, click on “More settings” or click on the little down arrow to the right; there you should see different options for choosing the “paper” size, pages per sheet, adjusting the margins and scale:
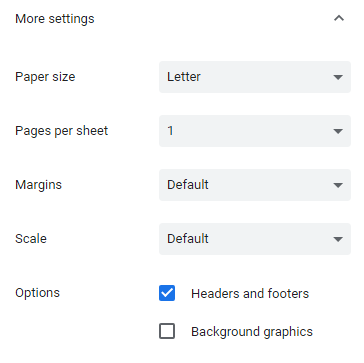
- Under “Options” you can check the box to print the page header and footer. As far as I can tell, though, this only adds the title of your page, website name and date to the very top – and adds the url and page # to the very bottom. These are the only things that were added when I saved one of my blog posts as a PDF:

added at the top
added at the bottom
- Change the selected option in the Destination field so that “Save as PDF” is selected in the drop-down menu:
-
- There is also an option to choose to print the background graphics or your page/post. This is a really nice feature that makes the resulting PDF look much nicer, and I usually check this box. There’s a big different between the two settings in the resulting PDF.
Without background graphics:
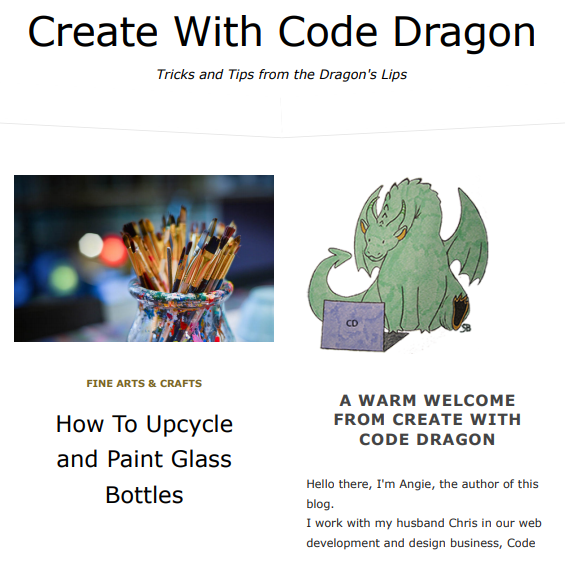
With background graphics:

- There is also an option to choose to print the background graphics or your page/post. This is a really nice feature that makes the resulting PDF look much nicer, and I usually check this box. There’s a big different between the two settings in the resulting PDF.
- Rename your file if needed.
- Lastly, click the blue “Save” button and choose a destination for where you’d like to save the file.
In Mozilla Firefox (with screen shots)
Navigate to the web page or blog post that you are looking to covert to a PDF.
Click the little hamburger menu (3 horizontal lines) in the upper right-hand corner of your browser screen, choose “Print”, then:
- Look at the top of your screen (if on a PC). You should see a horizontal menu of printing options stretching across your screen:
- Next to “Pages” in this top menu specify which pages to print and next to “Scale” decide what scale to print them at.
- Choose either Portrait or Landscape in the menu at the top. Modern websites lend themselves better to Landscape mode so I usually go with that.
- Check the “Simplify Page” box to print a pared-down version of your page, if that is desired. This results in a VERY stripped-down version of the page. When I tried it, it removed everything but the text and photos (removed the header, sidebar, etc.). And it changed my font style entirely:
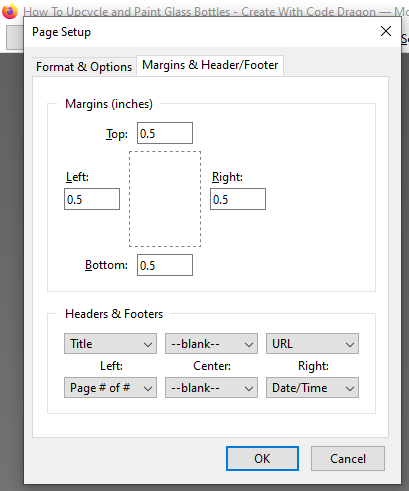
- Under “Page Setup… ” > “Format & Options” in the top left you should see again the options to choose Portrait or Landscape.
- For more control over the resulting PDF, click on that same “Page Setup… ” > “Format & Options” tab. There again you should see different options for choosing the “paper” size and adjusting the margins and scale.
- Under “Page Setup… ” > “Margins & Header/Footer” there are various options to choose from, including whether to print the background graphics (colors & images) or your page/post. This is a really nice feature that makes the resulting PDF look much nicer, and I usually check this box.
- Under “Page Setup… ” > “Margins & Header/Footer” you should see various options for printing info to the page header and footer.
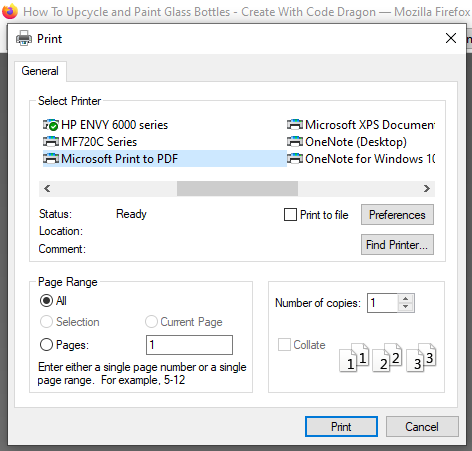
- When done choosing the various settings click “OK” then click again on the “Print… ” button in the top left of your screen. That should make this dialog box appear:
- Make sure “Microsoft Print to PDF” is selected and choose “Print” at the bottom of that window.
- Rename your file if needed.
- Lastly, choose a destination for where you’d like to save the file and click the “Save” button.

In Microsoft Edge (concise steps without screen shots)
Navigate to the web page or blog post that you are looking to covert to a PDF.
Click the little hamburger menu (3 horizontal dots) in the upper right-hand corner of your browser screen. Or right-click somewhere on the page or post, choose “Print”, then:
- Change the selected option in the Printer field so that “Save as PDF” is selected in the drop-down menu.
- Choose to print All under “Pages” to convert your entire web page or choose the Custom option if you’d like to choose how much of your web page to convert into a PDF (you might want to exclude the footer, for example).
- Under the “Layout” section choose either Portrait or Landscape in the drop-down menu. Modern websites lend themselves better to Landscape mode so I usually go with that.
- For more control over the resulting PDF, click on “More settings” or click on the little down arrow to the right; there you should see different options for choosing the “paper” size, pages per sheet, adjusting the margins and scale.
- Under “Options” you can check the box to print the page header and footer. As far as I can tell, though, this only adds the title of your page, website name and date to the very top – and adds the url and page # to the very bottom.
- There is also an option to choose to print the background graphics or your page/post. This is a really nice feature that makes the resulting PDF look much nicer, and I usually check this box.
- Rename your file if needed.
- Lastly, click the blue “Save” button and choose a destination for where you’d like to save the file.
Note: if you choose “Microsoft Print to PDF” in the “Printer” drop-down menu, an option will appear that will allow you to choose to print in either color or in black & white. A downside to going with “Microsoft Print to PDF” is that the output will be in the form of a PDF image as opposed to a text-based PDF. If you decide to go with this option, choose your settings then click the blue Print button at the bottom of your screen.