Adobe Photoshop is one of the most powerful and versatile applications we have available to us for editing photos and illustrations. Having worked with this app for about 20 years now, I have seen it evolve through the years into an incredible graphic and digital design tool. I’m still learning new techniques after all these years, and feel like I’ve only scratched the surface of what Photoshop has to offer!
Below I walk you through the steps of one of my favorite Photoshop image-editing techniques:
Adding a Gradient Overlay to an Image.
Ok, let’s get started. First locate a suitable photo to use as your backdrop, to lay the gradient over.
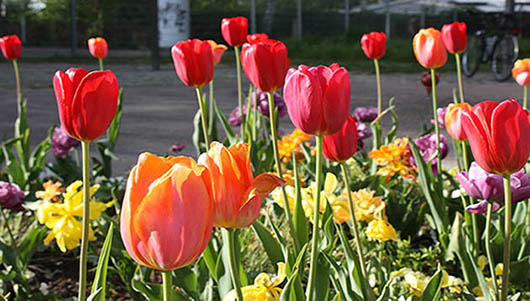
In this case I found a photo of some happy little spring tulips in the Adobe Stock Library. (I can’t wait for it to actually start feeling like Spring here in Connecticut!) There are many perks to having a subscription with Adobe, and with my subscription to Adobe products I get access to some of their free images – and they have a great selection to choose from.
Since most stock photos come in a 300 dpi format and I’m only planning on using this photo for viewing on the web (not planning on printing it), I made sure to change the dpi from 300 to 72. To do that go up to the main PS menu and select Image > Image Size:
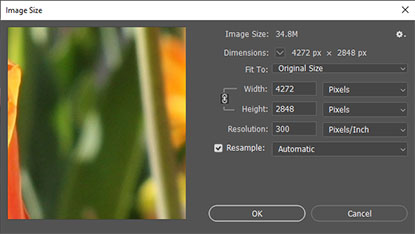
and in the “Resolution” space simply change the 300 to 72, then click the OK button.
Anyway, back to creating a gradient–
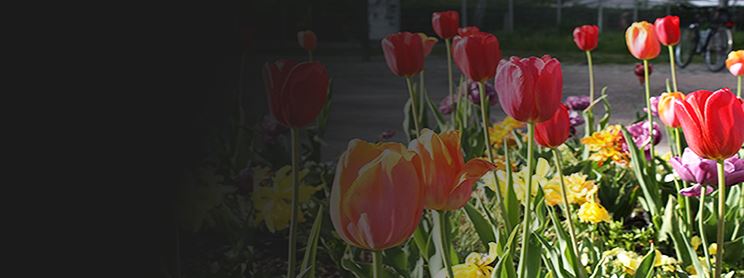
Here is my chosen photo in its initial unaltered state:
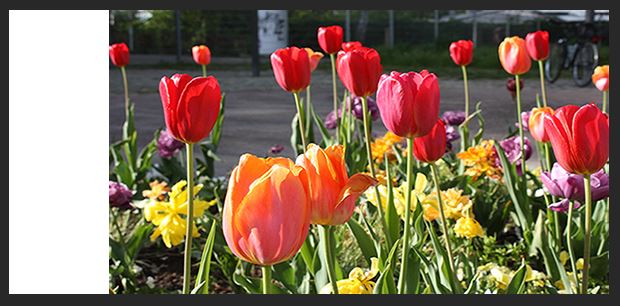
This is a pretty photo to be sure, but what if I need to use this as some type of “hero” or banner image that spreads out across the top of the page – with a text headline or title added? Whatever text I add will end up being almost completely unreadable, because the background image is so busy and contains so many colors. This is where knowing how to add a gradient layer really comes in handy! With a gradient layer I can darken one side of the photo, then go back and lay my text over that.
Next I went again to Image > Canvas Size in the top Photoshop menu and increased the image width by 200 pixels to give my text more room to breathe, and so that it isn’t laying across the middle of the photo. The goal here is to end up with an image that is much wider than it is tall:
Now onward to creating our gradient overlay!
To do this, go to the Layers menu, where you see the little thumbnail for your photo, and down at the bottom of that menu there should be a tiny icon that looks like a circle (with a miniscule arrow below it). Click on that little icon:
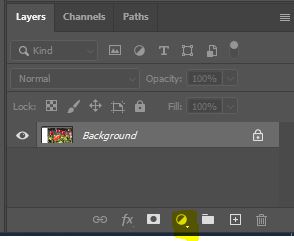
Choosing that icon should make a pop-up menu appear. Scroll to the top and choose “Solid Color…” from the list of options. Choose any color from the Color Picker. In my case I chose a medium gray shade. If you go too dark with your starting color it might make your overall image feel a bit heavy and dimmed-down.
Next, while still within your Layers menu, click on the white rectangle to select the layer mask (in this example it says “Color Fill 1” just to the right of the white rectangle):

Before you go any further make sure that you have black (or a dark color) selected for your foreground color:
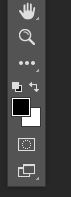
After you have checked on the foreground color, look again at that same side/vertical menu and you should see a “Paint Bucket Tool”. Select that, then choose the option for the “Gradient Tool”.

Try playing around with the different gradient styles and options (they should appear up in the top of your PS window when the Gradient Tool is selected). If you’re going for the more standard gradient of a dark color fading horizontally to a complete transparency, make sure the first little square is selected. That’s the option for “Linear Gradient”:

This effect we’re trying to create here is best achieved by using the more traditional gradient style of black fading to white (transparent). That option should appear somewhere in the top Gradient options menu, probably in the upper left area.
Creating the Gradient
At this point your main PS canvas should be appearing as a dark, solid color. Click somewhere on that solid color over to the right, keep holding down your mouse while dragging over to the left. Then let go of the mouse. Note: holding the Shift key down while doing that will result in a nice straight line/gradient effect.
Keep trying out different gradients by clicking over to the right and dragging back to the left. You can keep trying as many times as it takes and keep clicking; you don’t need to undo your last try in order to try it again. I personally like to click and drag at a slight angle, to give the gradient a more natural look (and to avoid having a perfectly vertical appearance to the spot where the dark part of the gradient starts to fade).
Now you should have a loverly, soft gradient that covers part of your photo that fades into transparency, like this:
You might need to adjust a few settings here and there to brighten up your photo, sharpen it, etc. And if the gradient comes out too dark, there’s always the option of adjusting the “Fill” level over in the Layers menu.
The next order of business here is to get some text overlaid onto our photo.
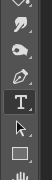
To do this I first chose the Text Tool (the big “T” in the left-side main menu), and chose white for my text color so it would show up against the backdrop of the gradient:
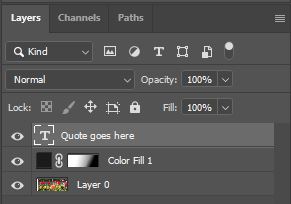
Make sure your new text layer in the first layer in the Layers menu. It should appear above the other layers for your image and gradient. If it isn’t, your text probably won’t show up until you click and drag the text layer up, like this:
Lastly, type in your text, adjust the font size and choose the appropriate font family, and you’re good to go!
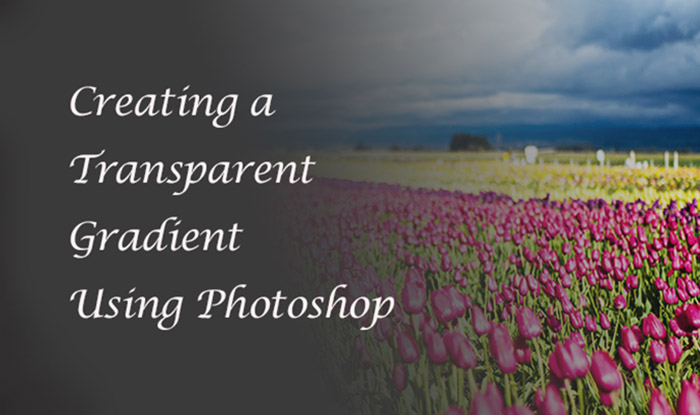
Here is how my completed image appears with some elegant text added over the dark end of the gradient:

I decided to use an inspirational Spring-related quote for my text, since I try hard to maintain a positive attitude and feed my mind positive thoughts on a daily basis. That isn’t always easy to do — at this point it’s about 30 degrees F here in Connecticut (and it’s nearing the end of April!!) But alas, I’m still holding out hope that it actually warms up by July… 🙂
Thank you SO much friends, for reading! Kindly please share this article if you liked it. For more Photoshop tutorials and related articles, please take a glance at these here below: